opportunity. Instead, they view it as smoke and mirrors, hocus pocus, and something extra to do on each call. The readings aren’t valuable to them.
What if I could show you four ways that static pressure testing expands your troubleshooting ability, exposes the problems behind your headache calls, and uncovers additional work? Would you reconsider its value then?
If you’re tired of dealing with ongoing equipment problems, costly callbacks, and unhappy customers, keep reading as we look at four issues you can discover and solve with static pressure testing.
Number One: Low Fan Airflow
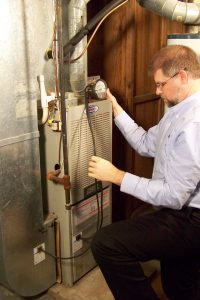
A wise man once taught me air is the first word in air conditioning. When it is incorrect, nearly every other function of the system suffers. Airflow makes or breaks a system – just ask any technician who has struggled to diagnose a unit that intermittently ices up or trips a safety switch. In the installation instructions of most indoor equipment you’ll find a fan performance table.
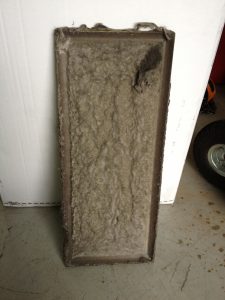
These tables provide a quick and easy way to determine how much air the blower is moving in a short amount of time. The tables are specific to the model number of the equipment they come with – so find this table first. To use the fan table, document the fan speed at which the blower operates and then measure total external static pressure (TESP). Find these two points on the fan table and intersect them to plot fan airflow. It’s important to note that the blower must be clean for the tables to be accurate. If the blower is dirty, clean it first, and then proceed with your testing.
Implementing this one static pressure test will start you in the right direction. You won’t have to guess any more. Before you attach refrigeration gauges to the service valves on your next call, consider using this test.
Number Two: Dirty or Restrictive Indoor Coil
The cleanliness of the indoor coil is a checklist item on many service tickets that must be verified. Many technicians take a lot of time to disassemble cabinets, so they can visually inspect the coil. You can get the same results with two pressure measurements and a quick calculation – no disassembly required.
Coil pressure drop is measured by obtaining a static pressure reading entering the coil and leaving the coil. Coil pressure drop is then calculated by subtracting the leaving coil pressure from the entering coil pressure.
Ideally, a clean indoor coil’s pressure drop should range between .20” to .30” w.c. (inches of water column). If the pressure drop is within this range, the coil is likely clean. If pressure drop is extremely high, you know the coil is dirty, restricted, or damaged and needs further investigation.
Be aware, some newer indoor coils are very restrictive to airflow. They could have pressure drops exceeding .30” and be perfectly clean. A newer, less restrictive coil would be a good alternative in this situation.
Number Three: Restrictive or Dirty Air Filter

You measure filter pressure drop by taking a static pressure reading entering the filter and leaving the filter. Then subtract the leaving filter pressure from the entering filter pressure.
Ideally, filter pressure drop should not exceed 20% of the fan’s maximum rated static pressure. With the average fan in a residential system rated for a maximum rated TESP of .50”, filter pressure drop should not exceed .10” (20% x .50 = .10).
If filter pressure drop exceeds .10”, you’ll need to make changes in the system for it to work properly. You can use a less restrictive filter media to lower pressure drop or increase filter surface area by adding another filter or increasing the size of the existing one.
Number Four: Duct System Restrictions
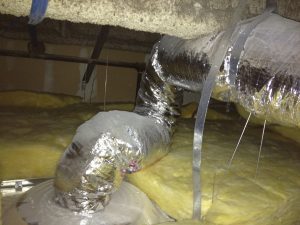
Undersized ducts are an epidemic in our industry. A single pressure reading taken near the equipment in the supply and return duct system can help you find restrictions or tell you if the duct is undersized.
Pressure readings before the air filter provide return duct pressure. Pressure readings after the coil provide supply duct pressure. Look for measured pressures that are over .10”. If duct pressures exceed this value, there is a good chance that side of the duct system is restricted somewhere.
Duct system pressures can be measured every four feet or so down the system to identify further restrictions. When you measure a drastic change in duct pressure, you’ve likely found the restriction. Loose duct liner, closed fire dampers, and collapsed ducts are common restrictions.
Don’t Procrastinate
There’s no time like now to start. If you’re serious about moving forward, contact me and I’ll get you started on the right path with some free static pressure testing documents.
You’ll also need the following test instruments and accessories to begin measuring. Some of these items may currently be in your tool bag. A good static pressure test kit consists of:
- An analog or digital manometer
- One length of tubing (3/16” i.d. neoprene works best)
- One Dwyer model A-303 static pressure tip
- A 3/8” bullet tip drill bit with a sheath to prevent drilling in too far
- A supply of 3/8” plastic test port plugs
- A carrying case.

Otherwise, you’ll get really frustrated and stop short of success. The best place to start testing is on your own HVAC system or one in the office. This gives you a chance to build confidence before going live with customers.
As your skills progress, you’ll see your troubleshooting abilities grow rapidly. Please send me your favorite airside defects and how you discovered them using static pressure.